
Possible Causes
When stores message us to say that Fontio is not working there are always the same four possible causes that we troubleshoot. At its core the issue will be actually caused by Shopify itself, but we can still solve what went wrong on the Fontio side.
Whilst we are experienced in solving these issues – we encourage stores to attempt to resolve themselves with the use of this guide as it is often a lot quicker than waiting for us to get to it.
We will go step by step through the issues here:
- I have applied Fontio settings but they are not showing up
- I have uploaded fonts but am getting errors
- Fontio isn’t showing up on my password page
These 3 issues can have several different causes which we check through every time. They are laid out below.
If you are experiencing issues – go through each of these one by one.
- Check the fontio tags are present inside the <head> tag in your theme (and password) file
- Check the fontio snippets are present in your theme
- Check the font files uploaded to your theme
- Check the font files are rendering
1. Check the fontio tags are present inside the <head> tag in your theme
Step 1: Go to Settings, then Sales channels, then Online Store, then Themes and Customize
Log in your store with the store owner’s account, then go to the Settings field in the bottom right. In Settings, visit Sales channels then click on Online Storethen click on Themesand finally Customize

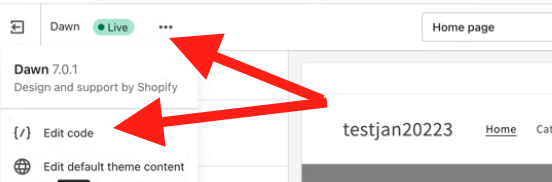
Step 2: Open up the "Edit Code" Screen
We’ll be adding a few files and a snippet of code so from the customize screen click the three dots on the top left and they click Edit Code
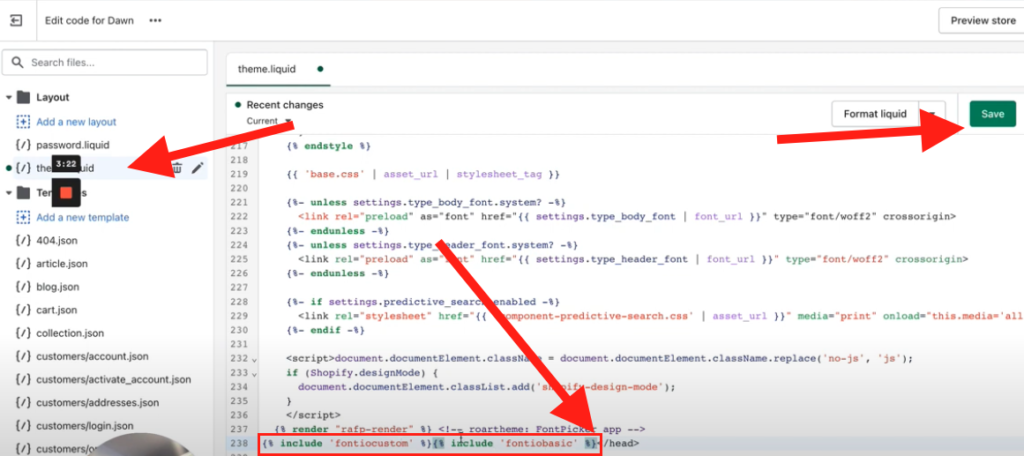
Step 3: Add the Fontio snippets to theme.liquid
The first edit we need to make is checking if the fontio tags are in the theme.liquid file and to add them if not. They will appear immediately preceeding the closing head tag. So to save time search for to /head in the file theme.liquid. If the following snippet isn’t there we need to add it.
{% include ‘fontiocustom’ %}{% include ‘fontiobasic’ %}
should be to the left of the closing tag.
If you copied and pasted it the likely did not paste properly, so replace the apostrophes in the tags.
Click Save.
FOR PASSWORD PAGE – repeat these process but add the tags in password.liquid.
Step 4: Reapply fonts in Fontio settings
You have now fixed the code part! What we need to do is head back to the Fontio dashboard and reapply the settings to the tags. Open up Fontio, select the relevant tags and apply the right fonts.
Step 5: Review changes on your site
Now, you have successfully applied a font to a tag it should show up in 2 places:
- On the front end of your live site
- In your theme editor
NOTE: Fontio will not add fonts to the topography section of your site settings.
2. Check the fontio snippets are present in your theme
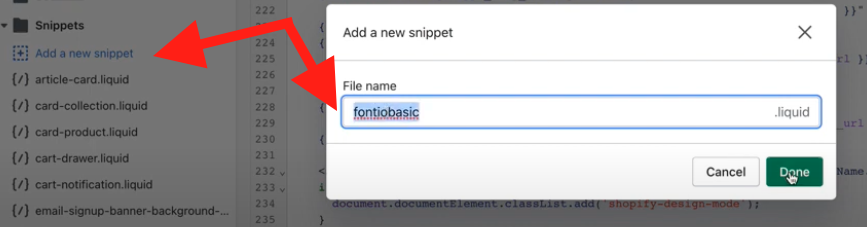
Step 1: Add the Fontio basic & custom files to snippets
In theme > customize > edit code > Scroll down to the Snippets section in the code and look for two files named fontiobasic.liquid and fontiocustom.liquid (the files are in alphabetical order). If they are not there, click Add a new snippet. You can simply paste in the file names to create them so create two files here and simply call them fontiobasic and fontiocustom. The work is done!
Step 2: Reapply fonts in Fontio settings
You have now fixed the code part! What we need to do is head back to the Fontio dashboard and reapply the settings to the tags. Open up Fontio, select the relevant tags and apply the right fonts.
Step 3: Review changes on your site
Now, you have successfully applied a font to a tag it should show up in 2 places:
- On the front end of your live site
- In your theme editor
NOTE: Fontio will not add fonts to the topography section of your site settings.
3. Check the font files uploaded to your theme
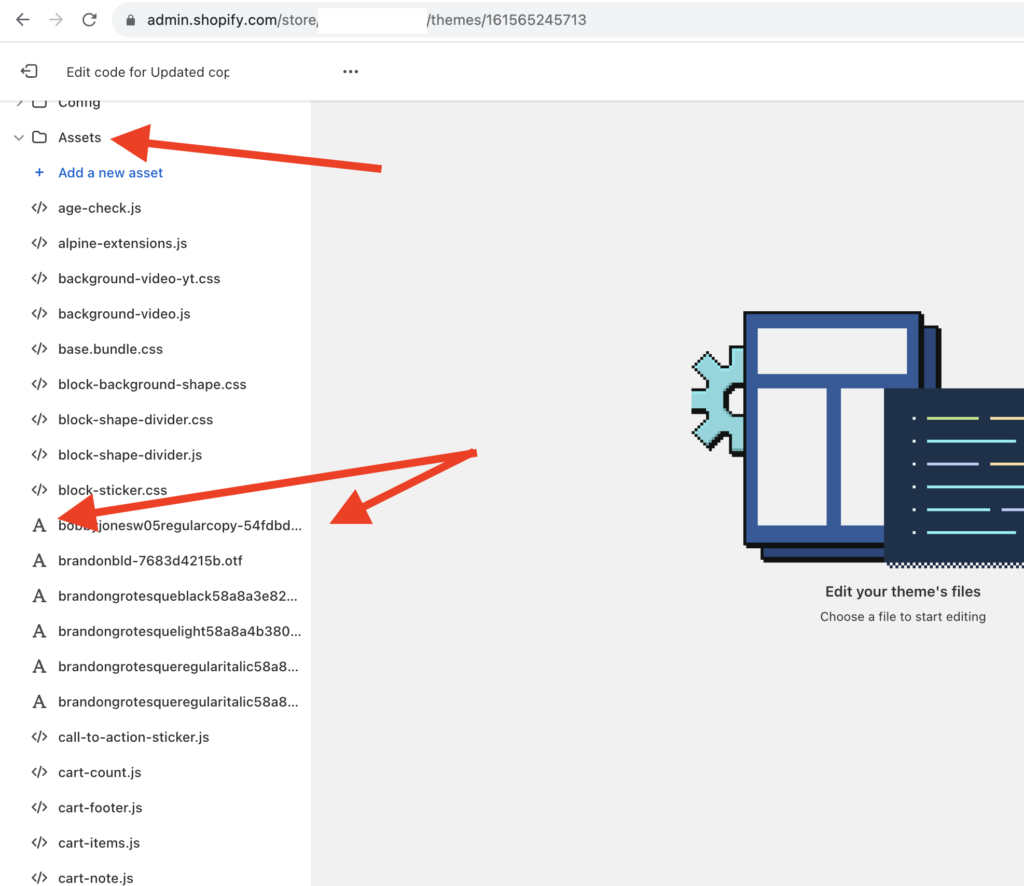
Step 1: Check your assets and reupload in Fontio if needed
In theme > customize > edit code > Scroll down to the Assets section in the code and look for the font files you uploaded. They will likely have a bunch of random digits added to the end of their names (thanks Shopify). You can identify them by the file ending being either otf, woff or tiff and they will have an “A” icon on their left.
If your font files are not showing up here – either the upload failed or you uploaded them to the wrong theme.
Head back to fontio, check the theme you uploaded them to in the drop down and if correct – delete the files from fontio and attempt uploading again.
Step 2: Reapply fonts in Fontio settings
You have now fixed the font part! What we need to do is head back to the Fontio dashboard and reapply the settings to the tags. Open up Fontio, select the relevant tags and apply the right fonts.
Step 3: Review changes on your site
Now, you have successfully applied a font to a tag it should show up in 2 places:
- On the front end of your live site
- In your theme editor
NOTE: Fontio will not add fonts to the topography section of your site settings.
4. Check the font files are rendering
Step 1: Find some text on your store you expected to change, in inspect
At this point you have checked tags, and snippets and assets and your fonts are not showing up – what may be happing is that the file itself is not rendering. So we need to dive into your code on the front end. This tutorial is meant for Chrome users.
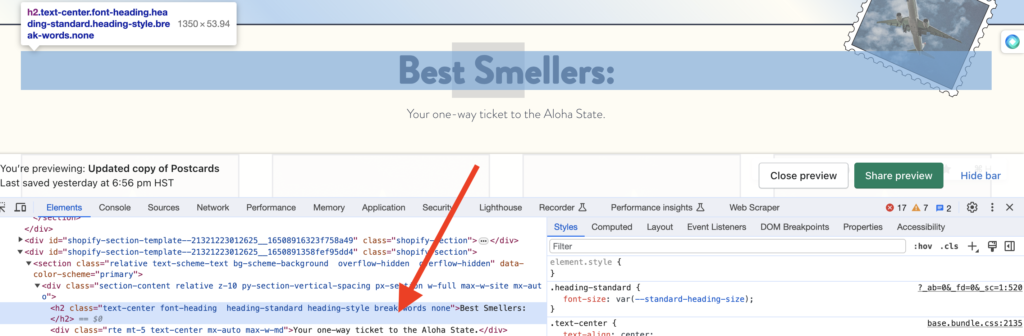
Open the store webpage, find a section of text that fonts should be applied to like a header.
Highlight that text and right click, then select inspect.
Sometimes when the inspect portal shows up it hasn’t highlighted your text, so you need to navigate through the code to get to the text you want. As you run your cursor over different code elements, the related element should highlight on the store. Do this until you get to the element of text you want. Click that section and it should turn blue.
Step 2: Search Font in the filter
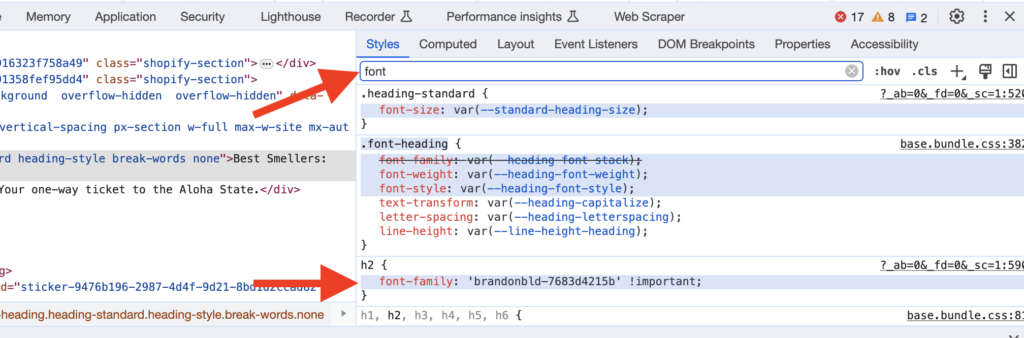
Next in the small box on the right where it says “Filter” type the word “font”.
This should automatically filter the code for all font settings and you should be able to see the setting for “font-family”, scroll down if it hasn’t shown yet.
Here you need to confirm that the font-family is in fact the font that you set.
Step 3: Confirm it is correct & take action
If the font family is correct, and the wrong font is showing – then the font file you uploaded has was corrupted in the upload. Simply delete the fonts set in the custom font tab of fontio, re-upload your fonts and reapply all of your settings. Then confirm that it worked.
If you font family is not the one you set in Fontio, AND you are sure you applied your font settings to the correct theme – reach out to us for support.
